3D Printing for Preppers: Investment Casting with PolyCast Filament - 3DPrint.com

3D Printing for Preppers: Funding Casting with PolyCast Filament – 3DPrint.com

While my humble family has not yet been struck by a disaster, there is no shortage of emergencies worldwide, and the COVID-19 pandemic has shown how useful even desktop 3D printing can be in disaster situations. Given the ability to review an Ultimaker S3 3D printer and several unique filaments, I thought I’d explore 3D printing simple goods that might come in handy in emergency situations to get an idea of ​​how useful a desktop 3D is -Printer could be.

As well as providing an overview of the subject, I also reviewed the Ultimaker S3 and spoke to Ultimaker about using desktop 3D printers in emergency and disaster scenarios. I also had the opportunity to test out some copper filaments from The Virtual Foundry that were sintered by Sapphire3D. I spoke to the manufacturer about the material as well as its myriad other unique metal filaments.

We tested the Ultimaker S3 device.

While metal filaments open up some interesting opportunities for making metal parts with a desktop 3D printer, some additional equipment and expertise is required to be able to make suitable parts. However, there is a 5,000 year old process that recently received a 3D printed makeover that anyone with a home 3D printer can try if they’re careful.

I’m referring to investment casting, of course. The oldest discovered object made with lost wax casting is a 6,000 year old amulet from the Indus Valley Civilization, a Bronze Age society in northwestern South Asia. The technique is to make a model out of a material like wax before making a mold from that model, and then pour molten model into the mold to create a solid metal replica. Obviously, these are more specific details than given here, and we’ll get to them a little later.

The oldest known piece of lost wax casting, a 6,000 year old amulet from Mehrgarh (today’s Pakistan). Image courtesy of Nature Communications.

As one of the oldest metal-making methods, it comes in many forms. Although the models were originally made by hand from clay or wax, 3D printing has lowered the barrier to artistic skill required to create these designs. It is now possible to take a model from an online repository, create a replica of a physical object with 3D scanning, or use CAD tools to design something to be cast.

There are also a number of 3D printers and materials available for exactly these purposes. For professional applications such as jewelry or tooth crowns, vat photopolymerization (digital light processing) [DLP] and stereolithography[SLA]) or inkjet 3D printing (solidscape wax printing) are usually the technologies of choice as they can achieve much higher resolution with the right materials. Inexpensive material extrusion (production of molten filaments) [FFF]) and DLP systems can also make models for casting.

As an FFF printer, the Ultimaker I tested had far fewer material options to choose from when compared to cheap DLP machines. Typically, DIY casting enthusiasts have used your standard PLA or flexible filaments to print their first models. However, there are some filaments specifically designed for casting on the market. The two most notable are MOLDLAY by Kai Parthy and PolyCast by Polymaker.

PolyCast 3D printing filament for casting Polymaker. Image courtesy of Polymaker.

The Polymaker team were kind enough to send me a free sample of their polycast material to try out. This filament is designed to have so-called low burnout, as only a minimal amount of ash remains when it is poured. In this way, when pouring into the mold, the liquid metal does not receive any defects from dirt in the mold cavity. For this reason, it is also important to post-process prints, sand down support structures and polish them smooth. This ensures a smoother cast object with fewer defects.

By this point in the verification process, I had clogged my second nozzle sufficiently that I no longer had access to detachable supports. I didn’t want to risk having too many flaws from PolyCast supports, so I printed objects with no overhangs. These should still be useful in an emergency. I chose a wrench and surgical retractor, the same models as the ones I made from PLA in a previous article in this series.

A surgical retractor and wrench 3D printed by PolyCast.

Printing was as easy as PLA. Since the material was in a sealed bag with desiccant, there was no problem with moisture. I just added the PolyCast printer profile to Cura and when the Ultimaker started the profile was loaded. After loading the filament, the printer had no problems at all.

The hard part came when I had to cast the prints. With a toddler and baby at home and quarantined during a deadly pandemic, creating your own casting station isn’t easy or safe, but I’ve thought about it. I’ll explain below how some people approached their own casting (somewhat interesting) before I got into it (less interesting). This is not a guide as I did not conduct the casting myself, but should be informative enough to give readers a sense of how it is being conducted.

Based on numerous online accounts, doing your own casting isn’t difficult if you take the right precautions, and it’s pretty doable in an emergency situation. As the video below shows, it’s actually possible to build a backyard foundry for under $ 20 to make ingots from aluminum cans.

This video shows that you can even make one with a soup can:

Once you have a model that you want to water, you need to make a tree. This wax structure holds the figure in place and burns out when pouring with the model. This process, known as spruing, is typically performed with a wax stick and wax wires that are fused together. However, it is also possible to 3D print the sprues directly with your model if you have CAD (or automated software) skills.

With the positive pattern from the last part, the next step is to create a negative. You can buy casting kits that come with all of the equipment you need, but you can also buy and make a lot of what is needed for reasonably priced. Basically, you need a container and medium that can withstand the heat of the molten metal that is poured into your mold.

Plastering process for investment casting with 3D printed samples. Picture one shows a 3D printed part in a drywall tray. Picture two, this tub as soon as the embedding plaster has been poured in. Picture three, the mold removed from the tub. Images courtesy of user Scottiek on Instructables.

I’ve seen a home improvement worker use a drywall tub on the container and enough investment plaster to protect the tub from heat. The model is then placed in the container and dipped in investment plaster, a toxic material that requires goggles, gloves, an N95-style respirator, and a well-ventilated area. Some home improvement makers have made their own investment plaster by mixing hobby plaster with fine quartz sand.

If you’re using a larger container, at the end, take your plaster cast out of the container and follow the steps below. However, if you use a sufficiently small steel container, this could be your piston going into an oven with the plaster of paris and the 3D printed pattern.

The key to a good final cast is eliminating air pockets from the slurry, which requires the use of a vacuum chamber. One caster, Adam Zeloof, relied on a mechanical pump attached to a coffee can before pouring it into the container you use for your mold. Another method is to clean the 3D printed part with isopropyl alcohol immediately before coating it with the embedding plaster.

Both techniques are designed to prevent bubbles from forming in the next step. In this case, put your 3D print with sprues in your container and fill the area with investment plaster. The plaster then hardens overnight.

Once you’ve hardened the plaster of paris mold around your 3D printed pattern, you can heat it in an oven or oven to burn out the pattern. This leaves a negative that you then fill with molten metal. Yes, that means we are almost at the direct production step. This requires heating metal to its melting temperature, whether through a backyard forge or a store-bought furnace, and then pouring it into the mold.

Adam Zeloof pours molten metal into a fine plaster mold, into a steel piston and onto his vacuum chamber for coffee pots. Image courtesy of Adam Zeloof / Hackaday.

The Zeloof mentioned above explains that there are different techniques to achieve the best metal part, as simply tipping the molten metal into the mold may not result in an even coating and pouring. His preferred method is to use the same DIY vacuum chamber, which consists of a pump and a can of coffee.

Once the metal has cooled, the shape can be dropped into a bucket of cold water. The plaster mold will break apart to reveal a metal replica of your 3D printed part as well as sprues. Finally, you need to saw off the sprues and polish the part.

It’s a bit of a complicated process, especially if you haven’t already done it, but once you get the hang of it, once you have the supplies and workspace it doesn’t seem too difficult. Although there is obviously a lot of trial and error and expertise to actually do a decent job. Then again, I didn’t!

What I did was find the nearest casting shop. Since I live in a remote part of the country, I had to send my 3D printed parts to Reinmuth Bronze Studio a few hours north of where I live and have them professionally staffed. In an SHTF scenario, a two hour drive for an emergency part might not be bad. When I worked for a medical clinic in a rainforest in Bolivia, it was a pretty normal standard for bringing a patient into town when the equipment or expertise needed wasn’t available in the middle of the jungle. Of course, it all depends on the scenario.

My last parts are cast in bronze.

Casting these two pieces in bronze cost $ 118. They arrived in very good condition and I learned that due to the presence of copper in bronze, they may even have some antibacterial properties. If I were a prepper I would definitely want to build my own forging and casting station where I could melt aluminum cans in my garden.

Source Link

3D Printing for Preppers: The Virtual Foundry's Metal 3D Printing Filament - 3DPrint.com

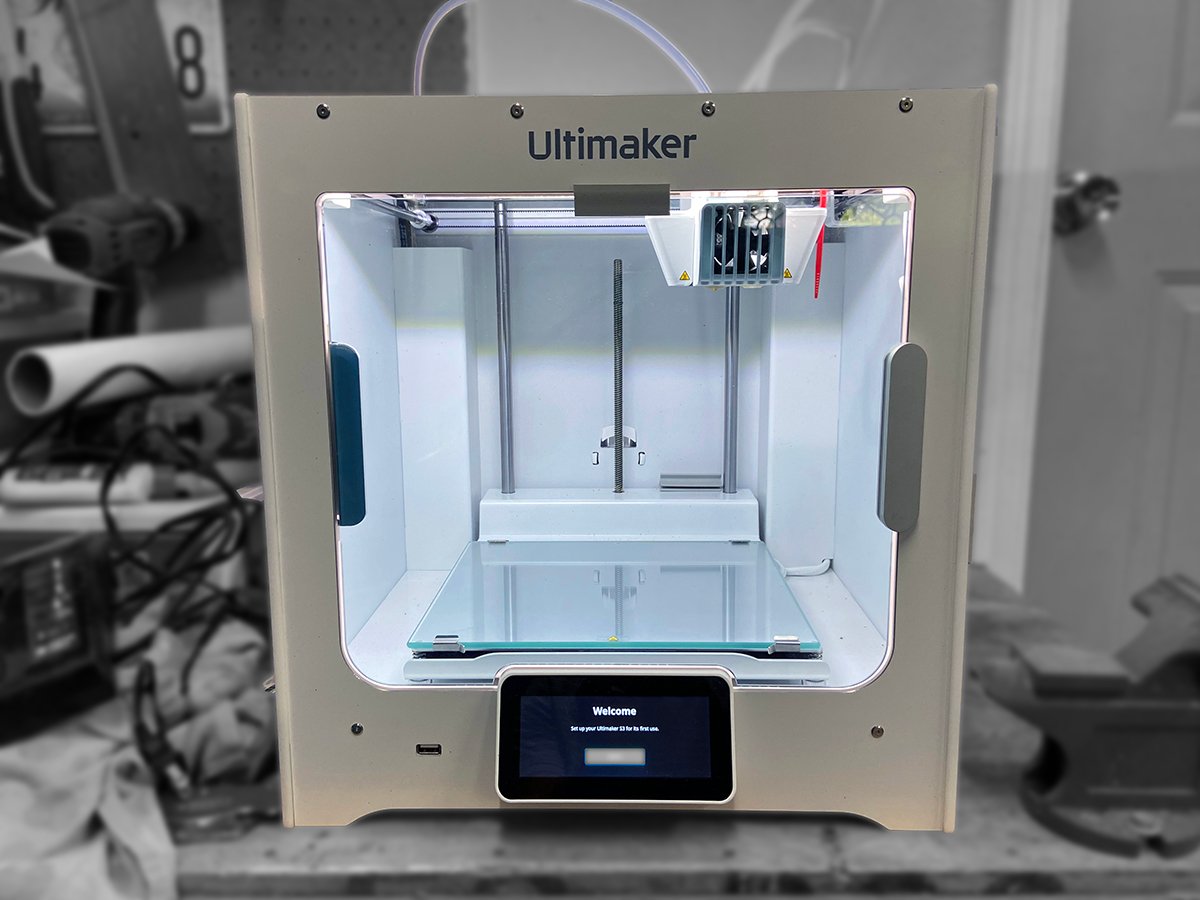
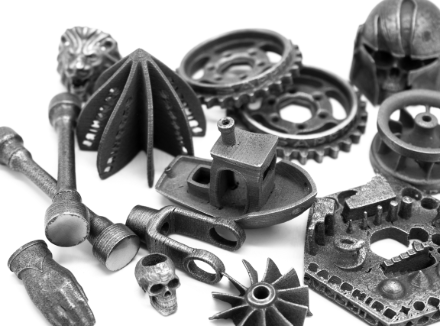
3D Printing for Preppers: The Digital Foundry’s Metallic 3D Printing Filament – 3DPrint.com

Anticipating the expansion of bonded metal printing by several years, Bradley Woods came up with the idea of ​​metal 3D printing of filaments in 2014 when he received his first 3D printer kit. After 3D printing plastic parts, Woods realized that to really make an impact, desktop 3D printing must be able to attack metal. Since he had already developed sculpture techniques with powder metallurgy, he came up with the idea of ​​making 3D printing filaments from metal powders that are bound in a polymer matrix.

The virtual foundry grew out of a 2015 Kickstarter campaign that achieved 107% of its intended goal and allowed Woods to move from his basement to a facility with commercial manufacturing facilities. Within two years, the basic technology matured and the startup was ready for a president to steer the ship. It was then that President Tricia Suess joined the company. We spoke to Suess and Woods to find out more about the company.

“Brad started with copper and now we’ve expanded our standard inventory to 14 different materials,” said Suess. “We have four ceramics, nine metals, including titanium and aluminum. And then we have a carbon fiber filament, which is our special binder mixture with carbon fiber. We also offer custom filaments. We do everything in 1.75mm and 2.85mm and also in pellet form. Brad works continuously to improve the manufacturing process and the usability of the filaments. Over the years they have become stronger and easier to work with. We have also put ever higher loads, which makes sintering easier and ultimately leads to a denser product with relatively little shrinkage. “

The company’s materials are two years ahead of Markforged and Desktop Metal’s bonded metal printing technologies. The latter companies are introducing their own forms of metal 3D printing in 2017. Both Markforged’s Metal X and Desktop Metal’s Studio Machine are closed, dedicated systems that offer the benefits of a plug-and-play experience, but are not flexible enough to accommodate any 3D printer for making to use fused filaments. Additionally, no chemical solutions are required to debond parts printed with The Virtual Foundry filament, so only one oven is required. All of this makes The Virtual Foundry more suitable for educational environments.

Parts 3D printed with Steel Filamet from The Virtual Foundry. Fired from Sapphire3D. Image courtesy of Sapphire3D.

It’s worth noting that there is a tradeoff between part density and shrinkage in both bonded metal printing and metal injection molding technologies. In the case of copper, the highest density attainable would be around 97 density with 15 percent shrinkage, but the shrinkage can be kept below 7 percent with 10 to 12 percent porosity.

In some cases this porosity can be an advantage when parts are designed as filters, for example, or when the part thickness is not critical. Despite this problem with bonded metal printing and injection molding of metal, useful parts can be made. One example that Woods supplied was that of a device for a machining process that gets particularly hot when the object to be machined comes into contact with the mill. For this reason, the virtual foundry’s carbon fiber material was used for the base, while copper was used for the area that comes in contact with the part. Due to a unique internal geometry, water can be circulated through the 3D printed component to keep the part cool.

A collimator for shield radiation in 3D printed with tungsten filamet from The Virtual Foundry. Image courtesy of The Virtual Foundry.

The wide range of materials that the company offers opens up some unique applications. For example, the virtual foundry’s tungsten, which weighs a little less than eight grams per CC, can be used as a non-toxic alternative to lead for radiation shielding and other radiological parts.

Regarding the emergency, Woods says the company has seen interest from the U.S. military:

“They drop those 3D printing pods that are built into shipping containers in a place where they need parts. Currently they are doing this with plastic and are experimenting with our product to expand metal parts with the same concept. They do this on battleships too, where they have several problems. You cannot 3D print with powder bed fusion. Due to the movement of the ship, most of the metal is 3D printed. However, this does not matter when using our material with metal in a binder. The same goes for low gravity operation. Powder bed fusion requires gravity. So we’re doing experiments at this end of the spectrum, also with a group that wants to print structures on the moon using the filamet process. “

Many of the projects that use The Virtual Foundry’s materials are under lock and key. This includes some research into the use of copper for COVID-19 shipments, taking advantage of the antimicrobial properties of this material. Aside from antimicrobial parts, it’s not hard to imagine some emergency situations where 3D printing copper would be of great benefit.

A couple of examples popped up to me right away when I started checking the copper filamet. One of these was copper induction coils, an increasingly popular application of copper 3D printing for industry. 3D printing could be used to replace copper coils for metalworking tools. A more quotidian use, however, would be to 3D print a copper hearth coil.

A metal air supply disc developed by Madhukar KC in Nepal with 3D printed prototypes and 3D printed by Field Ready. The air supply disc is used to provide cleaner and more efficient wood / fuel cooking for people in Nepal without a fan or stove. Image courtesy of Field Ready.

In Nepal, the non-profit Field Ready worked with a local parishioner to replicate a hob design. However, with copper material it might be possible to 3D print a hob yourself. As I mentioned in previous articles in this series, I am inexperienced with CAD. However, I was able to find a 2D spiral shape online and then extrude it in 3D using an online tool. Through 3D printing and sintering it would be possible to have an instant cooktop under which I could heat coals or wood.

My 3D printed SafeKey after sintering. Made from copper filamet.

And that’s just the beginning with metal filaments. Unfortunately, my SafeKey was too porous to use, but with a little extra work, some CAD expertise, and an oven, I was able to make objects out of titanium, nickel, aluminum, and more. According to Suess, the current material portfolio represents only the tip of the iceberg:

“We definitely want to expand our material bank to include more metals, but also other types of materials. We were contacted about possibly making one from hemp fiber. An ultra-light glass bubble filament that we manufacture with 3M is now on the development table. “

As described on the company’s website, “3M glass bubbles are high-strength, low-density hollow glass microspheres made from soda-lime borosilicate glass.” The virtual foundry is working with the chemical company to develop a method for 3D printing this unique material, one ultra-light filler already used in the aerospace, automotive, energy and construction industries.

“We mainly work on offshore oil drilling,” said Woods. “They use glass bubbles as insulation for the pipelines that run underwater because they have a low density. When you’re done, you can print something, burn the plastic off, and get a piece of glass that you can barely feel in your hand. It’s incredibly easy. “

The virtual foundry isn’t the only one developing metal filaments for 3D printing. The world’s largest chemical company, BASF, had developed a 3D printable stainless steel material. This leads to fierce competition and you can imagine a startup like The Virtual Foundry being taken over by the German giant. Regardless of what exactly happens, the startup is just beginning its journey. As the materials portfolio expands and the technology hits the market, the options for parts that can be 3D printed in emergencies only increase.

Source Link

3D Printing for Preppers: Copper 3D Printing Filament - 3DPrint.com

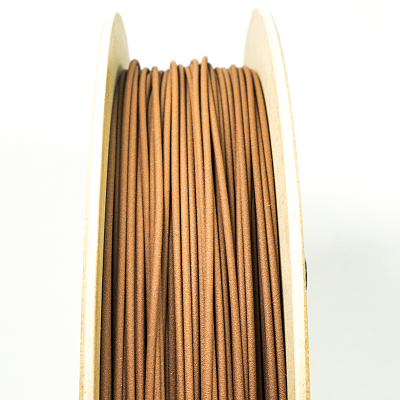
3D Printing for Preppers: Copper 3D Printing Filament – 3DPrint.com

While my humble family has not yet been struck by a disaster, there is no shortage of emergencies worldwide, and the COVID-19 pandemic has shown how useful even desktop 3D printing can be in disaster situations. Given the ability to review an Ultimaker S3 3D printer and several unique filaments, I thought I’d explore 3D printing simple goods that might be useful in emergency situations to get an idea of ​​how useful a desktop 3D is -Printer could be.

As well as providing an overview of the subject, I also reviewed the Ultimaker S3 and spoke to Ultimaker about using desktop 3D printers in emergency and disaster scenarios. Perhaps the most exciting prospect for me at the beginning of this series was creating metal objects with a desktop system.

To explore the possibilities of metal fabrication with a desktop 3D printer for plastic filaments, I turned to the Virtual Foundry, which makes filaments and pellets from metal particles in a thermoplastic binder. After printing, the part can be sintered in an oven, resulting in a dense metal part. In a subsequent article we will go into more detail about the virtual foundry and how it works.

Copper filamet can be purchased from the virtual foundry for about $ 66. It contains 89% – 90% metal with a density of 4.5 g / cm³ – 4.7 g / cm³. Image courtesy of the Virtual Foundry.

I printed the virtual foundry’s copper filamet on the Ultimaker S3 to see how easily a novice can make metal parts with a desktop machine in a disaster or emergency scenario. As someone with no 3D modeling knowledge, my first step was to find a part that would work as a demonstrator of the concept and be the main barrier to using a 3D printer in an emergency.

Without the right skills, my choices of suitable models were severely limited. Since metal AM is primarily reserved for high-end manufacturing companies, almost no models specifically designed for metal 3D printing are publicly available. Instead, public repositories like Thingiverse are dedicated to plastic parts.

So I had a couple of options: choose a model for plastic 3D printing and produce it with the Copper Filamet or design something yourself with user-friendly software. I tried creating something with TinkerCAD, one of the easiest online modeling programs to use, but ended up going with existing models.

I used the Filamet to print something that I discovered at the height of the COVID-19 3D printing hype: a hands-free door opener with multiple tools. The SafeKey was developed by the British startup Fractory and can not only be used to operate doors, cabinets, ATMs and other items that are shared with the potentially contagious public without having to use your hands. At the same time it acts as a bottle opener and wrench. Fractory made the tool from CZ108, antimicrobial brass with a copper content of 64 percent, which limited the chance of disease transmission.

Unfortunately, there are no photos of the pre-sintered version of my SafeKey, but it was printed just as smoothly as this copper device that the Virtual Foundry hosts on their website. Image courtesy of the Virtual Foundry.

So I reached out to Fractory, received a STEP file of the SafeKey and converted it to STL using an online tool. Since copper, like CZ108, has inherent antimicrobial properties, I 3D printed the SafeKey from Copper Filamet on the Ultimaker.

To print with the filament, I selected the material profile from the Ultimaker Marketplace. Although Cura recognized the copper filament, I had problems getting the Ultimaker itself to boot up the profile when I tried to load the filament. This means that the 3D model of the SafeKey was cut according to the correct settings for the copper filamet, but the Ultimaker was not optimized for loading the material into the printhead. I had to choose a material with settings that most closely matched the filamet and load it that way.

Before printing, I made sure the bed was completely clear of previous plastic prints and cleaned the extruders using the Tough PLA provided by Ultimaker and the instructions on the LCD screen. This involved hot and cold plastic pulls until the material emerging from the hot ends was smooth and cylindrical.

Once it was loaded, printing was extremely easy. The filament adhered perfectly to the bed. As explained in my previous post, the second extruder for carriers gave me some problems because I clogged it with polyvinyl alcohol filaments. This meant that I limited myself to less complex structures, which was not a problem with the SafeKey as it was already designed for CNC machining.

My 3D printed SafeKey after sintering. Made from copper filamet.

The part that was printed on the first attempt. Unfortunately, it was extremely sensitive and I snapped it in half while getting it off the bed. I printed again and again had no problems. Now, however, it was my job to sinter it into a metal part.

Initially, I reached out to a local art studio that offered the kiln for firing clay pottery, but due to the pandemic, the instructor had closed her business. In return, I contacted a nearby makerspace that she had donated the stoves to, but they were too busy to take on the project.

Another option I had was to buy an oven. For example, the virtual foundry sells equipment that starts at just over $ 3,000. Since this was a one-off project, I couldn’t justify the investment, of course, but luckily the virtual foundry has entered into a partnership with the sintering service provider Sapphire3D. The company agreed to sinter my part for free as I reviewed the material and had already made similar products to the SafeKey. If they weren’t providing free services, Sapphire3D sintering ranges from $ 50 for a 50mm x 50mm x 50mm copper part to $ 190 for a 4 x 4 x 4 100mm part Inch x 100mm x 100mm) 17-4 stainless steel part.

I sent the printed part to Sapphire3D, who sintered it and returned it with a turnaround time of about ten days. I was very excited to receive the final component and was thrilled to be holding a metal SafeKey that I had printed just days before. To test its durability, I only flexed the tool to see that it was split in half. My joy turned to devastation just as quickly. I reached out to the Sapphire3D team to find out what went wrong.

While my SafeKey snapped, the 3D printed copper finger that Sapphire3D sent me is pretty dense and sturdy. I’ve tried several times and it didn’t even bend. Image courtesy of Sapphire3D.

Although there were recommended printing parameters for the Copper Filamet online, the very first mistake I made was not to double the thickness of the tool, which was originally designed for CNC all-metal. David Lawson of Sapphire3D also recommended that the edges of the device be slightly rounded to increase strength. Lawson summarized his recommendations for me as follows:

“Your part was one that I was looking at when you sent it and thought this could lead to an improved sintering result based on the design and printing parameters. You can reinforce a thin part by making sure that the printing process really fills in all the cavities as much as possible, not only having 100% fill, but also making sure that there is a fill overlap (with the perimeter) of more than 50 % is present. It was a great first attempt to print with these materials, but I noticed a lot of cracks on the surface that will likely lead to areas of failure after sintering. “

While I was disappointed with the failure of my first Copper Filamet part, I was somewhat comforted by a free hands-free door opener that Lawson included when sending my part back. All experience has shown that the production of metal parts at the touch of a button is still out of reach, even if desktop metal 3D printing is essential for beginners.

As with desktop plastics, there is a learning curve. In this case, I was faced with a lack of design skills, a lack of furnace, and a lack of experience with both the materials and the sintering process. Had I had my own oven I could have learned some of these tricks. It is likely that smaller businesses can do this with relative ease as well.

In a follow-up post, I will speak to the Virtual Foundry team to learn more about the different materials and how those with the appropriate skills can help with emergencies and disaster scenarios. The interview helps us determine what types of parts their materials are suitable for. Then I will discuss my experiences with an investment casting material for 3D printing and the resulting metal parts.