How tight are the manufacturing tolerances of modern FDM printer filaments? Inquisitive people want to know and when such heads are tied to handy people like [Thomas Sanladerer]In the end, you have something like this homemade filament meter to collect the data you are looking for.
The heart of this setup is not, as one might assume, an exotic laser device for optically measuring the filament diameter. These exist, but they are expensive parts of the kit that are best left to the manufacturers who use them on their production lines to make sure the filament meets their specifications. Dear, [Thomas] I used a very clever homemade device that relies on a hall effect sensor and a magnet on a lever to get the job done. The lever is attached to a roller bearing that runs on the filament as it spools through the sensor. Variations in diameter are amplified by the lever arm moving a magnet across the Hall sensor, resulting in a signal proportional to the filament diameter.
The complete test stand has a motor-driven feed and take-up reel as well as three sensors that measure the filament at three different points in the radius. The measurements are averaged together to account for small irregularities. [Thomas] Several different spools ran through the machine, representing different manufacturers and materials. We’re not going to spoil the results in the video below, but suffice to say that buying from a reputable supplier is probably little to worry about.
When we see a filament sensor, it is generally more of the “there / not there” variant to prevent a printer from running blindly once the roll is used up. We’ve seen some of these before, but this is a nice twist on the concept.
Continue reading “Simple sensor makes filament measurements a breeze”
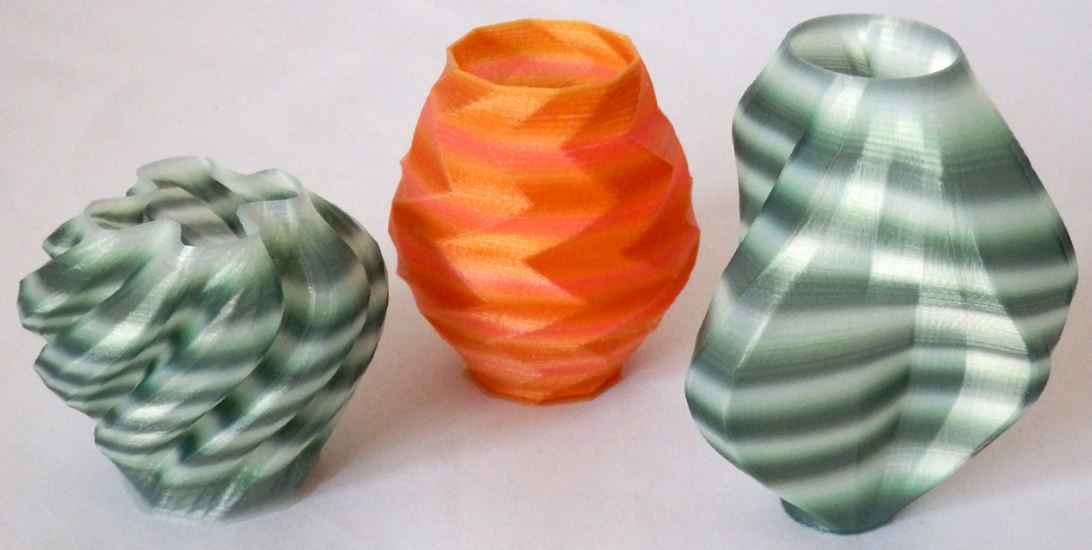
A recent research paper shows a way to create multicolored 3D prints from a single extruder if you’re too lazy to babysit the machine and change filament. The concept: Print your own “programmable” filament with the right colors in the right place. This is the same idea as splicing filaments manually, but is likely to be more efficient because the process works with one color at a time and does not repeat itself. In other words, to print the 64 squares of a chessboard, you would swap the filament at least 64 times on each layer. With programmable filament, you load a spool, print half the filament, load another spool, print the other half, and finally load the newly created filament and print the checkerboard. Note that the first two operations do not print the chessboard. You print the spool of filament that you go through on the third pass.
There are machines out there, of course, that are made for this, although generally they just stitch lengths of filament together for you automatically. Using a filament solves the problems of aligning multiple heads, as well as the added cost and complexity. However, you now have different problems such as: B. the transition between materials and knowing exactly how much material will be at each point of the print.
Continue reading “Programmable filament for multi-color printing”
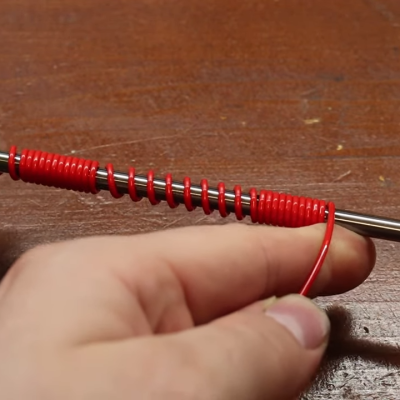
The next time you need large plastic springs, this is something you should consider [PattysLab]Method of making plastic springs from replacement filaments. The basic process is simple: wrap a 3D printer filament tightly around a steel rod, secure it, wrap it in kapton tape, and then heat it. After cooling, what remains is a reasonably working spring, apparently with all of the benefits of annealed plastic.
The basic process may be simple, however [PattysLab] has a number of tips to help you get the best results. The first is to use a 3D printed jig to anchor one end of the filament to the steel rod, and then use an electric drill to tightly wind the filament. After he has wrapped Kapton tape around the plastic (wrap it against the direction of the spring winding so that the subsequent pulling off of the tape does not pull the spring apart), he hangs it in a preheated oven at 120 ° C for PLA and 160 ° C for PETG. How long will it stay there? [PattysLab] use the following method: when the spring is coiled, a few inches of filament protrudes to serve as a visual indicator. When that segment of filament sags, this is its cue to begin the retrieval process. After cooling, a compression or expansion spring is created, depending on how it was wound before heating.
[PattysLab] shared a short video on this Reddit post showing both feathers in action, and the process is covered in the video embedded below.
Continue reading “Heat turns 3D printer filament into feathers”
[Proper Printing] has been trying to 3D print rims for his car for some time. However, the size of the print has created problems with spools of filament running out before completion. This created endless headaches trying to join several smaller lengths of filament to make a single larger spool. After his initial attempts at hand failed, a rig was built to bring some consistency to the process. (Video, embedded below.)
The rig consists of a heating block designed to melt the ends of two pieces of filament so that they can be fused together. A cheap set of brass calipers has been modified with a tube to form a guide for the filament to ensure it connects neatly without flaring up to a larger size. Fan coolers are then placed on either side of the heating area to avoid turning the entire filament into a hot mess.
Unfortunately the rig just didn’t work. The original design just never made the filament hot enough, with the suspicion that heat was instead directed into the calipers rather than the filament itself. Changes to reduce this unfortunately didn’t help, and in the end more success was achieved simply by holding a lighter under a piece of brass tubing.
Although the project was unsuccessful, learning along the way is still valuable. We cannot see any fundamental reason why such a rig could not work. So if you have any ideas on how to improve it, check out the comments. We’ve also seen other successful builds with hair straighteners in a relatively simple setup.
Continue reading “Fancy Filament Joiner promises, but ultimately fails”
When you have a pile of old VHS tapes in your attic or basement that you know you will never watch again, either because all of those movies are available on DVD or streaming service, or because you haven’t been working on VCRs In 2003 there may be a way to use it in other ways. With the miles of tapes available in just a few cassettes, [Brother] aka [Andrew] shows us how to use this tape as filament for a 3D printer. (Video, embedded below.)
The first step in the build is to actually create the filament. He uses a specially made homemade press to spin multiple ribbons into one filament, much like the way cotton or flax is spun into yarn. From there, the filament is simply fed into the 3D printer and put into operation. The ribbon filament needs to be heated higher than a standard 3D printer filament to make it print much slower. However, the resulting product is indistinguishable from a normal print, with the exception of color. It has some other interesting properties as well, like retaining its magnetism on magnetic tape and being a little more brittle than PET plastic, although it appears to be a little stronger.
While VHS filament may not work for all plastic 3D prints, it is still great for something that would otherwise likely end up straight to the landfill. There are a few other uses for this magnetic tape as well, such as when you want to build a DIY particle accelerator.
Continue reading “3D printing with VHS tape filament”
If we’re honest, our workshop isn’t as clean as it probably should be, and a lot of manufacturers out there are likely to be saying the same thing. This can have effects, e.g. B. clogging of the motors with iron filings, or in this case dust, which affects the quality of 3D prints. With the aim of tackling this, [3Demon] built a fun SpongeBob dust filter for their 3D printer.
The filter works in a simple way. The SpongeBob shell is 3D printed in half with a hinge connecting both parts. There is a piece of sponge in each half. The two halves are then snap closed, with the filament running through a hole in SpongeBob’s head and out through the (square) pants. With the sponge wrapped up nicely, dust will be wiped off the filament as it passes through the bob to the printer.
While it is important to carefully install the filament to avoid filament advancement issues, it is an easy way to automatically clean the filament during the printing process. You will be surprised how dirty your filament gets after sitting on the shelf for a few months. Removing such contaminants will reduce the likelihood of annoying problems such as delamination and jams. Avid printers should also consider making their own filament. Have fun printing!
3D printed parts are generally not nearly as strong as an equivalent injection molded part and techniques such as prolonged heat treatment, although they tend to distort the part beyond use.
[CNC Kitchen] examined the results (video, embedded below) of a recently published paper describing a novel ABS filament reinforced with a “star-shaped” polycarbonate core. According to the authors, this arrangement is resistant to deformation during the annealing process, which is often required to increase the part thickness. While researchers had access to specialized equipment necessary to make such a composite material, [CNC Kitchen’s] The solution to simply using its twin extruder setup to print the required hybrid filament directly is something we think is very much in line with the now old school, RepRap “print your printer” vibe.
The printed filament appears to be of reasonable dimensional accuracy and appears to feed the printed spool through a heating block with no nozzle attached to ensure there are no obvious clogs. The rest of the video focuses on a very thorough comparison of strength and deformation between the garden variety of polycarbonate, ABS, and this new hybrid filament after the annealing process. Although he finishes with mixed results, being able to combine and print just your own hybrid filament is super cool and a success in itself!
Interested in multi-material filaments? Read our article about a more conventional approach that doesn’t require you to print it yourself!
Continue reading “Can a 3D printer print a better filament for itself?”