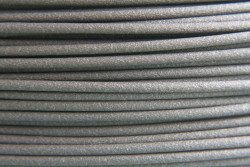
ColorFabb’s XT-CF20 is one of the more exotic filaments for adventurous 3D printerers to get their hands on. This PETG based material features a 20% carbon fiber content, aspiring to be the material of choice for tough parts of high stiffness. It’s a fascinating material that’s certainly worth a closer look. Let’s check it out!
An Abrasive Fellow
The high amount of carbon fibers makes this material extremely abrasive, so I obtained a hardened steel nozzle for my E3Dv6 hotend to print it without harming my brass nozzles. It’s also worth mentioning that the filament is capable of cutting deep grooves into extruder idlers and other printer parts on its way through the printer.
Behind this rough surface hides an abrasive character.
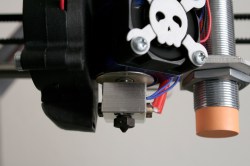
Hardened steel nozzle and Jolly wrencher fan guard are absolutely mandatory.
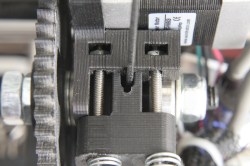
Extruder idler after 1/4 spool of XT-CF20.
The Composition
XT-CF20 features an Eastman Amphora PETG base resin, which itself is already a tough material and lies about half way between PLA and ABS in terms of temperature resistance. Yet, PETG filaments are fairly undemanding to the printer hardware: No high nozzle or bed temperatures, no heated build chambers and also no exotic build plate materials are required. The XT-CF20 combines this resin with 20% carbon fibers. These fibers come as a finely milled filler rather than in the shape of long, reinforcing strands, so they surely don’t bestow super powers on printed parts. However, the XT-CF20 features a significantly increased shape fidelity, stiffness, and temperature resistance compared to the unfilled members of the XT family.
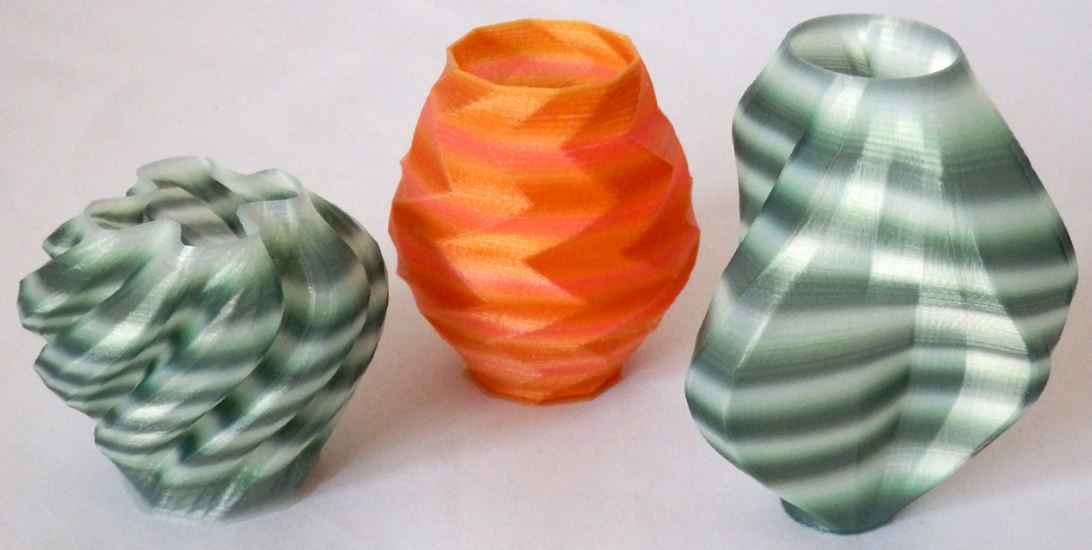
Print Quality
To get an encompassing idea of the material’s surface-finish, overhang tolerance, and bridging capabilities, I printed below Benchy, which resulted in a highly uniform texture and color with a nice matte finish. The bridges and overhangs at the cabin windows turned out great, and all details came out nicely. Despite all countermeasures, it has a tendency to ooze and create little blobs and artifacts here and there, which can be an obstacle to printing something that has to look perfect.

0.2 mm, 240 °C, 25 mm/s

0.2 mm, 240 °C, 25 mm/s

0.2 mm, 240 °C, 25 mm/s
Conductivity
Probably by accident, the material safety data sheet describes this material as conductive, but nope, it’s merely antistatic. Despite the high carbon fiber content, the XT-CF20 features a surface resistivity of 109 Ω/sq (as stated in the technical datasheet) and is nothing you’d want to print your circuits with.
Warping
PETG filaments generally show a very low tendency to deform during printing, and with the high fiber content of the XT-CF20, the issue of warping goes down to virtually zero. Part of my tests were several massive 100 x 20 x 10 mm bars with 100 % infill, which I printed on a glue-stick-coated glass plate. It stuck to the plate perfectly straight during the 4 hour print with not a single corner lifted. That’s something I cannot even reproduce with PLA. In terms of shape fidelity, this material really deserves 5 out of 5 perfectly straight bananas.
Perfectly straight, chunky bars with 100% infill.
Build Plate Material And Adhesion
In my tests, the filament adhered to plain borosilicate glass briefly. Small objects could be printed directly to the glass surface, but taller objects were prone to just popping off during the print. With a thin layer of glue stick on the glass, I was able to print the massive blocks shown above with perfect build plate adhesion.
I also tested the material on my PEI build plate. The build plate adhesion was certainly stronger than necessary for a material that does not warp at all, but all parts could be removed without damaging the PEI plate or the parts themselves. Glue-stick on glass is probably the better solution for printing XT-CF20.
Bed Temperature
ColorFabb recommends 80 °C for the print bed, which worked great. Going below 80 °C led to problems getting the first layer to stick to the glue-stick-coated glass plate, but caused no problems when printing on the PEI plate.
Printing Temperature
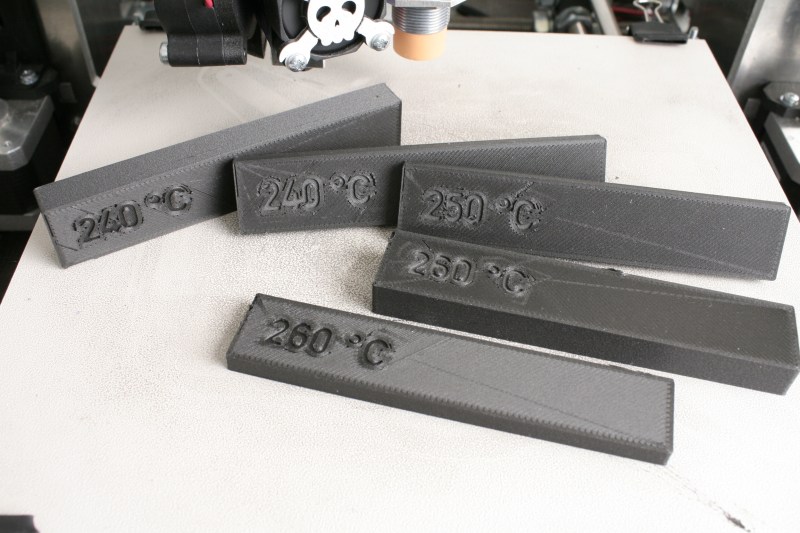
The XT-CF20’s specified processing temperature ranges from 240 to 260 °C. I tested it at temperatures from 230 °C to 310 °C, and well, 240 to 260 °C is really the sweet spot. At 230 °C, parts can still be printed well, but the results are weak and break easily. Parts printed at 240 °C are already quite strong, but still have a slight tendency to break at the interface between the layers. At 260 °C, cracks no longer occur in between layers, but throughout the part, which indicates perfect layer bonding. Below fracture test series shows the difference quite clearly, and if you were wondering, was conducted by meticulous professionals using a laboratory-grade set of hammer and chisel.
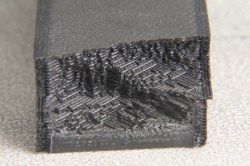
printed at 240° C, 25 mm/s
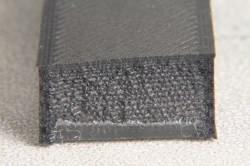
printed at 250° C, 25 mm/s
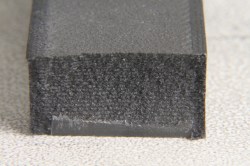
printed at 260° C, 25 mm/s
At about 290° C, the material starts to noticeably deteriorate until printing becomes virtually impossible at 310 °C. Eventually, the best looking results were produced at 240 °C and 25 mm/s printing speed, with little oozing, while parts printed at 260° C and 25 mm/s printing speed were extraordinarily tough and showed perfect layer bonding.
Oozing
Not all PETG based filaments are alike, but many tend to ooze. So does the XT-CF2, with droplets of molten material flowing out of the nozzle during travel moves. Over the course of a print, some of these oozed material droplets are also collected back by the printing nozzle, where they accumulate to a larger drop of liquid plastic, which sooner or later drops down to the print, creating blob-like artifacts and sometimes even massive obstacles for the print head to run into.

ooze accumulating on the nozzle

oozing blob

oozing disaster
The issue can be mitigated by printing at lower temperatures and speeds. With a printing temperature between 240 and 260 °C, printing becomes practical at 25 mm/s, with little oozing and low material buildup on the nozzle. Other settings I found helpful in mitigating oozing are a slight underextrusion, as well as activating “retractions on layer change” and turning off “only retract when crossing perimeters” in Slic3r. Keeping the retraction length short — 2 mm for the E3D hotend I am using — speeds up the retraction moves and prevents nozzle clogging.
Printing Speed
ColorFabb recommends a print speed (40 – 70 mm/s) for the XT-CF20, although, within printing temperatures of 240 to 260 °C, the maximum printing speed I could achieve without strongly affecting layer bonding was 25 mm/s for perimeters and infill and 10 mm/s for small features. As mentioned before, lower printing speeds also result in reduced oozing and fewer blob-artifacts.
These values deviate a lot from ColorFabb’s recommendation, so I still could be wrong in my findings. Nevertheless, in ColorFabb’s comment sections, complaints are piling up from users who are unable to “print anything” with XT-CF20 and the recommended settings. In contrast to that, Pau from Tilt Racing Drones in Sweden published a highly positive review showing the great results from his efforts to print drone frames from XT-CF20 at painstaking 15 mm/s and 260° C.
Resilience
Parts printed from XT-CF20 are extraordinarily stiff and can take a beating. The technical data sheet attests XT-CF20 this outstanding toughness, below table puts the values into a known context.
| ColorFabb XT-CF20 |
ColorFabb XT |
ABS (typical) |
PLA (typical) |
|
|---|---|---|---|---|
| Flexural Modulus ISO 178 / ASTM D790 molded specimen |
6.2 GPa | 2.1 GPa | 2.3 GPa | 2.3 GPa |
| Tensile Strength (max.) ISO 527 / ASTM D638 molded specimen |
76 MPa | 50 MPa | 35 – 55 MPa | 60 MPa |
| Elongation At Break ISO 527 / ASTM D638 molded specimen |
7.5 % | 10 % | 20 % | 4 % |
| Glass Transition Temp. | 80° C (176° F) |
75 °C (167° F) |
<105 °C (<221 °F) |
60 °C (140 °F) |
Overhangs
With the settings dialed in, I threw a plain overhang test object with overhang angles from 15° to 75° at the material. It was printed at 0.2 mm layer height with a 0.4 mm nozzle at 240° C with a nozzle fan to selectively cool the overhangs. The test ended in a messy catastrophe when it reached the 75°, which destroyed the test piece, so I redid the test with a maximum overhang angle of 60° for the below photograph.
Bridging
A positive effect of the PETG resin’s high melt strength is its excellent bridging ability. The XT-CF20 bridges even large gaps of 40 mm without specialized print settings, and even made it across the 80 mm bridge. Note that these bridges were printed with default settings, such as a bridge flow rate of 100%, with only a nozzle fan to selectively cool the bridges. These settings might be tuned further for an individual setup to obtain better results.


Support Material
I found it necessary to configure Slic3r to 0.0 mm Z-contact-distance to get a reasonable adhesion between the support structures and the actual print when using XT-CF20 on my single extruder setup. Also, a higher extrusion width of 0.7 mm for the support structures was necessary to prevent Slic3r’s support material from degenerating, since it’s printed with a greater layer height. The support material could still be removed and breaks easily at the touching points. Given the resilience of the material, the support structures themselves were also quite rigid, which could be a problem when printing objects with a lot of support material all around them.
Hygroscopicity
 Generic mechanism for hydrolysis by FrozenMan CC BY-SA 4.0
A noteworthy property of the XT-CF20’s PETG base resin is its hygroscopicity. It absorbs water from ambient humidity, which then leads to a chemical reaction named hydrolysis once it’s printed — or otherwise heated above 160° C. The reaction causes the longer polymer chains in the material to decompose into shorter chains, which results in higher brittleness of the material. Wet PETG can be dried for a few hours at 65 °C, although preventing it from getting wet in the first place by storing the filament in a sealed bag with silica gel seems to be the way to go here.
Safety
XT-CF20 comes with a material safety data sheet that should be read. In particular, dust created when sanding or otherwise processing the material should not be inhaled and can also form an explosive mixture with air. The filament is not explicitly hazardous, but the MSDS clearly lacks accurate toxicological data. For good measure, I’d rather not use this material for objects that come in contact with humans on a regular basis or use a varnish to seal the printed parts.
Conclusion
XT-CF20 has its caveats. Oozing is still a problem, and the low printing speeds take the fun out of the large, tough parts that this material would theoretically enable you to print. Nevertheless, it’s an exceptional material, capable of a beautiful surface finish, while at the same time being extremely tough and able to replicate steep overhangs and wide bridges. Because it does not require high temperatures or special build plates, it can be printed on virtually any printer that can be equipped with a steel nozzle (or comes with a cheap supply of brass ones). And it does not warp a micron. There are many use-cases where a tough material of high stiffness saves the day, regardless of little deficiencies or long printing times. Be it DIY drone frames, GoPro fixtures or even functional, load-bearing parts for 3D printers and small CNC mills.
I hope you enjoyed diving into a rather exotic 3D printing filament with this very first filament review on Hackaday. Have our readers yet run into projects where they’d wished for a tougher material? Other filaments you’d like to see here? Let us know in the comments!
Test conditions
Printer: Prusa i3 Einstein Rework (Proosha IIIo , photo) Hotend: 1.75 mm E3Dv6, 0.4 mm hardened steel nozzle, E3D PT100 thermocouple kit, narrowly ducted, axial nozzle fan, super-power-bestowing jolly wrencher fan guard Drive System: GT-2 belt drive with 20T pulleys for XY, M5 threaded rod for Z w/ cardan coupling, 0.9° 1.7 A Wantai stepper motors, DRV8825 Stepper Drivers in 8x microstepping mode for XY, IGUS RJ4JP-01-08 dry lubrication bushings on XY, LM8LUU linear bearings for Z Electronics: Ramps 1.4, Arduino Mega 2560, 12 V / 500 W ATX power supply Build plate: Makertum MK1 500W AC heated bed, Vishay NTCLE203E3 thermistor, PEI printing plate or glass printing plate clamped on top, UHU solvent-free glue stick, capacitive distance switch for auto bed leveling Firmware: Marlin-RC7